Dramatic Context
Georgia Brown
Postiche | Beard and Moustache
Resolving problems and practising new techniques

First moustache, colour correcting: Changing shape


I started off knotting a moustache which I believed to be correct in shape and colour. I used an auburn and dark brown hair mix to match the sitters hair colour and after knotting the bulk of it I started to see noticeably big differences between the two. At a closer examination of the sitters facial hair I noticed his beard and moustache were a lot lighter in colour than his hair. They have a lot of blonde and light brown tones running through them and the underside of the beard matches his hair colour which looks to be auburn/dark brown. The shape I'd drawn out was also in correct, it was too long and would limp across my models mouth without any defined shape. I want the moustache to look thick and wirey (un kept) and my first attempt was looking wispy. Rather than unpicking the bulk of the moustache I created a new template and begun knotting again. The new template was shorter and wider in the mid section, allowing room to knot more hair to sit just above his lips. I also blended blonde and light brown hair with the dark brown and auburn to break the block colours up. I kept referring to my portrait to direct me on where to knot the colours.


Weaknesses:
I found knotting a moustache very difficult in my first year of study and this disheartened me before I'd even begun, it isnt a field I necessarily see myself focusing on soley, and when I begun knotting the moustache for my portrait I felt un confident in the process. I videod a demonstration in class and watched it sevral times. I also watched DVDs on knotting and postiche which helped to an extent. However, the technique itself was the most frustrating and I struggled to pull the hair through the lace with the knotting tool for days. After loosing confidence in the process I began watching the tutorial and DVDs again and it wasnt until I lost fear in it that I actually begun to pick up pace. The first half of the moustache took around fifteen hours to knot and the second half was knotted in less than half of that time. Knotting is definitely a technique which requires a lot of practise and the moustache was a massive learning curve for me, it felt more rewarding knowing I carried it through without giving up.


Before dressing:
I was ecstatic with the colour blend through the moustache. I liked how natural and coarse it looked. I was also pleased with the overall shape and added in extra sparse hairs around the edges to break up any visible lines I could see. However, the moustache was too thick and I had to use cuting scissors to take out some of the knots at the base. Even with a lot of hair taken out the moustache still looks thick but works in reflection to my portrait.
Cutting and dressing:


I pinned the moustache to a soft block and used a tail comb to section areas whilst curling it with the 'Marcel tongs', Once I was happy with the length of the curls I cut across the hair to match my portrait. When I was happy with the shape on both sides I used more soft block pins to secure the moustache in place and sprayed it with hairspray. There were a few stray hairs I'd cut too short and wouldnt curl under, I carefully layed cling film over the hair to flatten them and keep the structure together.


Trimming lace and measuring fit:


I thought the moustache was accurate until I applied it. It is too big in length and with and will need to be trimmed down further if I want it to mimic the sitters in the painting. The one thing I am happy with is the colours, the moustache being the lightest in the postiche blends naturally and ties the beard and hair together.


Once Id fitted the template to a hard block I looked at my portrait to figure out which colours I'd need to use. The sitters beard is auburn and dark brown under the chin, where the hair would be the thickest, the hair would look darker because of shadow and the positioning of his head. The underside of his beard matches his hair colour and I used the appropriate browns to knot this section with. For the sides of the beard where the hair grazes his jawline and his chin I added in more blonde and light brown hair. The sides and front of the beard look a lot lighter in the portrait, matching his moustache, which is blonde/light brown all over. Once Id knotted the bulk sections of the beard (i.e. chin and sides) I again looked at my portrait to perfect areas of colour and the shape from the jawline up.
Correcting the beard:
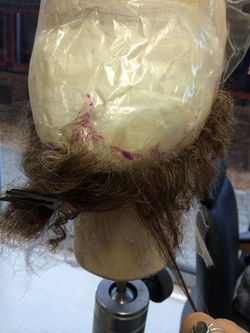
When I referred back the the portrait I noticed that my template didnt quite measure the full underside of my models chin. I had to extend the darts and continue knotting under the chin to avoid the beard looking false. I seen the difference when I held the block up next to the portrait and the hair underneath the chin didnt reach the hyoid bone and thyroid cartilage.
The styling process:
Self improvement: Technique evaluation
I enjoyed styling and cutting the beard. After the moustache everything about the technical process seemed a lot simpler. I found that I handled the Marcel tools with a better grip and seeing the final cut was extremely rewarding for me. A lot of care went into the beard, more than the moustache, and I think its because I felt determination whilst I was knotting it. Knowing that the result would potentially ruin my final make up if I didnt follow the correct and appropriate techniques (i.e. directional knotting/ colour mixing/ speradic knotting). I feel proud of the shape, cut and colour and I think my knotting skills have greatly improved since my first year of study. Holding the beard in place against my models face, the cut and shape looks accurate to me without the sparse fine hairs on his cheeks which will be layed on during the final application.


Both the beard and the wig together, in their correct placement.
Beard and the moustache together. Moustache needs re-styled and trimmed.
Synthetic wig | Cutting and styling:
Minimising shine and taking away length


Continued...
I wanted to cut to look short and choppy, without any particular style or wave and I didn' know how Id acheive this with scissors. I booked a tutorial with Carolyne Hinds and she showed me a quick technique called Razor cutting with scizzors. Rather than cutting the wig I used the scizzors like a razor and gradually took away unwanted bulk hair, thinning and cutting the hair around the sides and front in particular. Considering the wig is synthetic the cut lookes accurate before laying on any hair around the side burns and a good representation of the portrait. Before the final fitting I will purchase dry shampoo for brown hair to matte it down and take away the synthetic feel it has to it. The dry shampoo for brown hair is preferable because doesnt look as dusty and has a hint of colour which will prevent the synthetic hair from looking grey/ white.
Continued:
I used the knotting technique rather than adding in wefts because the fine hair looked subtle and was ment for breaking up the colour naturally in that area, leading to the sideburns and moustache which will both be lighter in comparison.
Cutting Technique:
I purchased a synthetic wig for the final look because my models hair is too short on the sides and back. I needed to add around two inches to the length all over and change the colour slightly. The wig didnt need re-fronting because the sitters hair is relatively short and hidden inside a beret. However, I needed to cut it shorter as it was longer in length than I expected it to be.
Colour Matching:
Suprisingly the synthetic wig is a good colour match to the sitters hair in the portrait and it doesnt require a colour change with dyes or paints, I layed the three different browns I was using to knot the beard and moustache with and chose the lightest (auburn) to knott into the wig around the ears/ sideburns. I also used blonde to knott in where the hair would sit above my models ears.
Knotting a beard | Styling & accuracy:
Cutting, styling and the outcome...
 |
|---|
 |
 |
 |
 |
 |
 |
 |
 |
 |
 |
 |


Laying on Hair:
Laying on the hair was harder than I initially thought it would be. It wasnt a paticularly hard process, more; ensuring the hair was in a natural placement, the direction in which the hair would stick or how much hair to lay before it looked false, avoiding any hair merging together, I found difficult. from practising ive learnt to use less glue and spread the hair in my fingers, trimming a straight edge, before laying it against the face. I acheived the speradic look that I'd intended but the hair wasnt straight and fell in different directions. Looking at the photographs I dont think I'd need to lay on as much hair as I did either, especially around his cheeks.