
GB
For one of my designs I wanted to create an animal brow, which would represent a regressed primal self. I started looking at lion, wolf and tiger brows but the wrinkle detail was central to the faces of those particular predators and I wanted to focus on the forehead area, leaving the rest of the face natural and painted in an editorial fashion.
SCULPTING


Small chisels and dental tools: Chisels of 5mm and smaller can be used to take back seam lines and very small imperfections very close to the cast surface. Small chisels can also be used to open up cracks and seams prior to filling.
Dental tools in various shapes and sizes can be very useful to remove imperfections in very highly detailed areas that are difficult to access.
SCULPTING TECHNIQUES
with Christopher Swift
Swift, C. (n/a). Hybrid Design: Practical To Digital: Christopher Swift. Stan Winston School. [DVD]. Stan Winston School.
Below: Delpech, J-P. and Figueres, M-A. (2004). The Mouldmakers Handbook. A&C Black Publishers. Soho Square: London.
The Sculpture:
Heated clay which has been cut up into small blocks. Clay used: Chevant sulphur free clay. Harder clays tool better and have a wax feel to them.
PRO TIP: Start where you like, getting your rudimentary ratios in the correct place. Callipers are good to buy for measuring technical armatures, plastic are often cheaper.
Good for affliction and problems with 2D design, rake and loop tools are preferable to use for sculpting.
PRO TIP: Nature: Everything has a blue print for how it works mechanically and as soon as you go against that, it is noticed. Your mind should always relate to this, how does it relate to nature and is the functionality accurate.
Bringing out detail:
The clay will take on its own shadow, it is a matter of seeing shapes form. Your knowledge of anatomy or lack of it can accentuate your work. Having blinders on to reality has a surreal effect sometimes. There are no rules or regulations as it is your own vision.
Even if you are editing the sculpt digitally you should finish it to cover your back, only sculpt what you need.
PROCESS


I sculpted the dog brow on a generic face cast, ready for my first attempt at fibre glassing and used the dog brow images on the research page for the design influence. I had to cut out the VAC FORM face and sand down the edges to reduce any ridges of rough and potentially harmful plastic. The lines around the eyes and neck of the face where drawn on as indication lines for sculpting, In effect, they where an indication of where to stop so that there would be enough room for grounding.


I have learned to sculpt using small sausages of clay from watching various tutorials and I find it makes the sculpting process a lot easier to manage. It allows you to build up layers of clay and rough out shapes early on, and avoid over detailing early on. Above are photographs of the sculpting process I went through, using Le Beau Touche clay. The clay is relatively easy to manage but I find that it is sticky in texture and I will look at purchasing other clays when I run short of it, I would rather work with a harder medium and sculpt into it. The shapes sculpted on the forehead reflect those of the Sharpei dog, the skin is loose and therefore creates a permanent wrinkling effect.
 |
|---|
 |
 |
 |
 |
 |
 |
 |
 |
I used dental tools and small loop tools to carve in the deep wrinkles central to the brow piece and then I used a tiny loop tool to pick out the pores. I found it hard to depict the pore size and direction because you cannot see underneath the dogs fur, I carved the pores in the direction which the wrinkles lay as though they were skin and I wanted them to look relatively deep, presuming they would be because they are supposed to be hair follicles. The sculpt either side of the face above the eyes is supposed to hang over the models brow and in effect, arch over the eyes, creating a sunken socket. After I had cared in the basic shapes and pores, I used a stippling sponge to texture the surface and continued to add in wrinkles and textures with loop tools over plastic wrap.

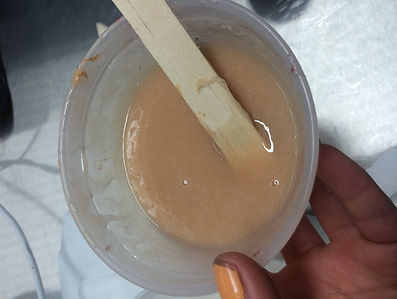
GELATINE

The first run of the fibreglass mould was done in gelatine, this way I could roughly work out how much silicone was required. I pigmented the gelatine with a mixture of ps composites sin pigment, MAC NC35 and NW20 foundations and red/pale blue and moss green flocking. I matched the colours to a models face before mixing the pigment; this way the prosthetic would blend naturally with the models natural skin tone, before colouring. The prosthetic came out easily from the mould but looked very greasy; this was because I used a liquid demoulding Vaseline that I purchased form pebeo. The Vaseline worked effectively but there wasn’t enough gelatine poured into the mould and there was one small edge on the bottom left hand side of the prosthetic.


Instead of applying the brow piece as it was, I ran the mould again in gelatine, without using the liquid Vaseline. The gelatine is already glossy and I wanted to avoid it looking like a false prosthetic, I needed the brow to look apart of the face and I couldn’t take down the shine from the release. There was still residue release on both the core and in the negative so it wasn’t necessary to apply more. The second prosthetic came out a lot less shiny and I preferred the colouring, which had more of a yellow base, similar to my models skin tone. The edges were blend able and I think this may have been because the bolts where tighter. I powdered the prosthetic and etched it out of the mould with talc.

GELATINE APPLICATION
 |
|---|
 |
 |
 |
 |
 |
 |
 |
 |
 |
First attempt at matching my design:
The prosthetic was too big for my models forehead and I lost the thinnest edge at the top, the edge was blend able but not as thin as I would have liked. Other than the to edge having o be cut down the rest blended nicely into the skin, I used warm water to blend down the edges because I think witch hazel can be too harsh and sometimes splits the gelatine, I learned this from a previous project where the prosthetic continued to split. Below: You can see where the prosthetic was too big for the models forehead and had to be cut to size, destroying the blending edge on one side.

Changes needed:
For my final make up I will alter the design and although I like the smudged eyeliner, the whole look doesn’t work as a whole and it wasn’t what I imagined it to be. I painted the brow using skin illustrators and looking over the images I think I should have allowed the creases to find themselves. The sculpt was detailed enough and I didn’t need to draw in the lines which seems to overwhelm the surrounding make –up. I want the piece to work collectively with an editorial style make-up and I have learned not to paint the prosthetic as heavily, or at all. Instead, I will attempt to pigment it to perfectly suit the models skin tone and run the piece in silicone. The silicone will not appear as shiny and will move with the mechanics of the face more naturally. I do like how the make-up looks aggressive, almost lion like, but from a distance the model looked like a human/hybrid character (a vampire) and this is what I want to avoid for the final look.
INJECTING SILICONE


First attempt:
Vaseline was used as a release agent on both the core and the negative and this didn’t prevent the prosthetic from sticking. I couldn’t break the mould apart and the sculpt was unusable. The problem could have been with the cap plastic layers, which were sprayed on with an oil catering spray bottle. The bottle sprayed out water like fine mist but the cap plastic-alcohol mix sprayed out which meant there wasn’t an even coat of cap plastic on either of the two parts. The prosthetic seemed to adhere to the vac form face more than the fibreglass and I couldn’t physically remove it from the core. This may have been because the cap plastic layers where too thin or the release agent wasn’t apply thoroughly enough.


Problems:
I didn’t take a photograph of the prosthetic after pulling the mould apart for the second time as I forgot. However, I took a photograph when it was removed to show the problems with the second injection attempt. I used Polywax mould release the second time around and buffed both the core and the negative. However, the prosthetic was still stuck inside of the mould and I found it very difficult to etch it out. I had to pour baby powder into the mould and release it gradually using a small paintbrush. The prosthetic again released from the negative without fault but it was stuck to the vac form face and it was very time consuming attempting to peel it off without ruining the blending edges. The piece eventually separated from the core but as you can see on the above middle image, there were tears on the back of the prosthetic where the cap plastic had ripped. Fortunately, the edges hadn’t ripped and the piece was manageable. The problem may have been the cap plastic, I cant be sure. I applied four layers with a ratio of 3:1 cap plastic to alcohol and it still adhered to the vac form. If I where to run the piece again I would apply more release to both parts.
I overestimated the amount of silicone needed to fill the brow piece for the first attempt and I used equal parts A and B at 40g with 75% softener at 60g for the second running of silicone. I wanted a small wastage, enough for the silicone to reach the flashing and create an overflow but not so much that there would be a pool of excess underneath the mould.