
GB
FOAM LATEX FABRICATION
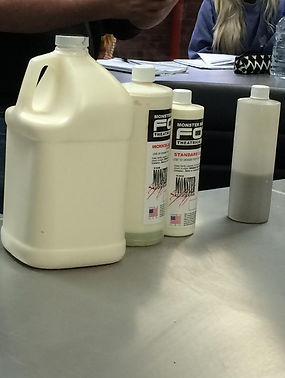


Materials: Hot Foam Latex
-Cream latex base- GM FOAM reliable products. made to mix with other products, doesnt become rubbery it becomes foam
-Kryolan foam latex is not good to use, there are too many components. Not good up close for hd, the foam latex components react with cold temperatures and it will be damaged. Uv light and heat can also damage the products, do not store it in these conditions or on the floor. They do not expire and can be used for years after purchase if looked / sought after.
-Monster makers foam: Foaming agent. Always use 20% of the base in agent. (Soap like) will make it rise, hot foam latex because you bake it.
Curing agents: Working Time
-Gives the foam a sponge texture (use10% of the base) Gelling agent: Should be mixed in after the other agents, just before putting the piece in the oven, otherwise there is a risk of it setting too early. The colder the weather the more gelling agent needs to be added. It helps set the foam without it loosing shape before putting it in the oven, the amount added can be varied.
(You need a thermometer to check the exact temperature of the room. If it is slightly humid you have less time to work with the foam) adjust the amount of gelling agent accordingly.
Buy pigment or use skin illustrator to colour the foam (specifics for colouring the foam) certain acrylic paints can be used and food colouring can also be used but both are not recommended. Test different paints to colour the foam to ensure accuracy in your desired colour match. Powder is difficult to work with, liquid pigment gives a better finish. When mixing the foam, depending on the mixer which is being used to alter the time accordingly. You need to refine the foam by making all of the air bubbles smaller. The gelling agent will react more as the foam is mixed and the foam will rise accordingly. The more gelling agent added, mixed with the refining time the faster it will set.
PRO TIP: Because the curing time is so fast with foam latex it is best to line your mould and core. This way you can fix them together securely without having to pull them apart to secure a fit. The mould will have less air bubbles and look neater and there will be no wasteage in material.
Moulds:
-Foam tends to collapse on a non porous mould. -fibreglass -fast cast (urethane resin) 2 part -silicone -plaster. Any material but plaster can be taken out of the oven straight away. If you take it out of the oven straight away then the plaster will break because of the change in temperature. Turn off the oven and ensure the plaster has cooled down before taking it out. Foam silicone- smooth on product, not compatible, dangerous chemicals.
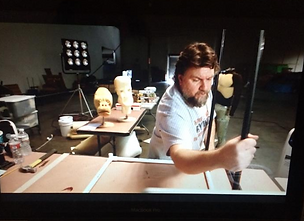
Below: Steps Stan winston school- foam latex video (research)
Gilles, P. (2014). BA Hons Make-up for Media and Performance. Arts University Bournemouth. 18 December.
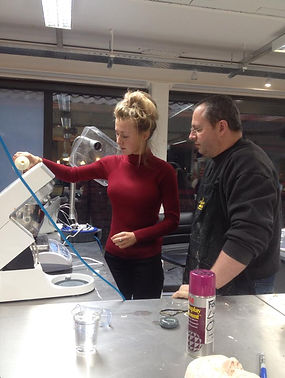
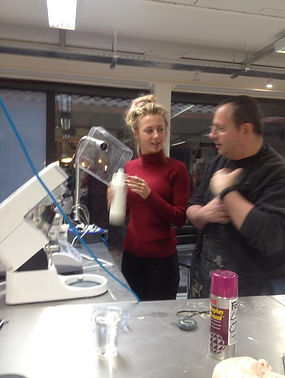
The Mixing Method: Important Steps
See above videos to relate the figures which are listed below
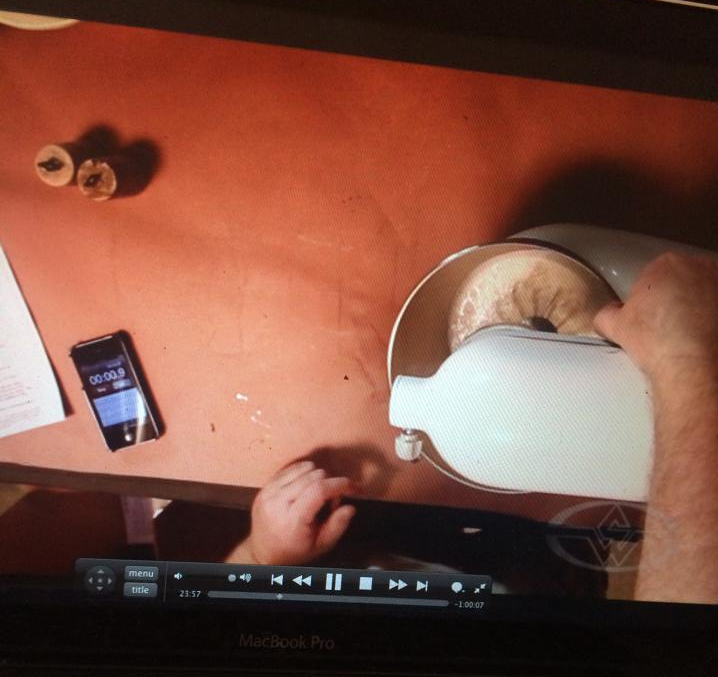
Mixing system: planetary whisk system spins at the joint and axes, it has a strong and reliable motor which produces good foam latex. The more you whisk the foam the lighter and softer it gets.
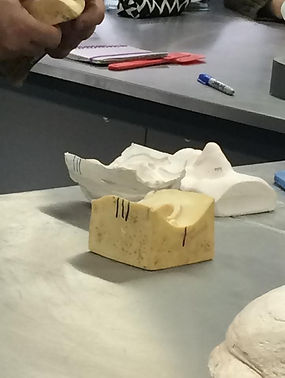
Mark both your negative and positive moulds with different markings (across each side, top and bottom)
-Take mould release or zinc stearait and brush over both parts of the mould, the entire plaster surface. No petroleum jelly (vaseline) should be used on the plaster for foam latex because it breaks down the latex. It will destroy the material, only one coat is required. (The first mould will always stick)
-Do not go near silicone with latex gloves because it inhibits the silicone.
- 200g foam latex -100% - 40g foaming agent -20% - 20g curing agent -10% -gelling agent 12% - room temp 23 degrees. (Varies with room temperature)
-Slow the speed of the mix for 5-6 minutes to refine the mixture, taking out any air bubbles before adding the gelling agent, Check the foam has set by pressing it in between your fingers. If no liquid disperses then it is ready to be put in the oven at around 85 degrees.
-If there is moisture in the mould with fibreglass it has nowhere to go. Therefore, you do not want the oven to be around 100 degrees in temperature.
-The heat takes around 1 hour to set the foam latex per cm of your mould if using a plaster mould. If the mould is fibreglass it will take around 1 hour per mm of your mould.


FOAM LATEX HOT FOAM
Foam Fabrication, Texturing Techniques with Ted Haines
Mixing The Foam Rubber:
Make sure you are in a well ventilated area
–The hotter it is the less gelling agent you want to use. A lot of experimentation is required, a (g) scale is required for the process. (gram scale, food scales, preferably electronic)
–The instructions are usually supplied with the product, be sure to follow them precisely
–Foam used: Burman Industries GM Foam. (Davis Supply, Motion Pictures)
–It is a chemical mixture and the specific measurements are required for health and safety.
PRO TIP: Roma Clay (water based) can affect the latex, check your sculpting tools do not have water based clay residue on them.
Haines, T. (n/a). Foam Fabrication, Texturing Techniques, Stan Winston School. [DVD] Prosthetics studio: Stan Winston School.
Notes Taken: Process
-Weigh three components and mix together, the gelling agent needs to be very precise in measurements as it can be dangerous and react. (less is used with humidity, check the temperature)
-Gelling agent can be set aside in a cup, the more gelling agent that you use, the less working time you have with the foam.
-Check the times on the instruction manual and use a stopwatch to check the time accuracy. Instructions may require different time and speed settings whilst mixing.
-Mechanical grade foam: whipped faster and for longer- softer foam. Prosthetic grade foam: whipped for less time and not as fast, it has to move with the mechanics of the face.
-Slower the speed for refining and ultra-refining (usually for face application) Knocking any bubbles out of it. After ultra-refining the foam you then add the gelling agent and continue mixing.
-Once the foam starts to cure, the air alone will create a skin on the surface with liquid foam underneath. Then it is finished and a new batch needs to be poured and mixed.
PRO TIP: If the air temperature is hot the foam can easily cease up whilst adding the gelling agent, be careful with the room temperature and timing.
PRO TIP: Spatulating the foam onto the core controls the thickness.

EDGES, NETTING & FOAM FACTS
-Silicone has the translucency for old age and skin texture where as the foam is opaque but light weight
-Power Netting: Two types: To give strength and reinforce the foam, keeps it pristine.
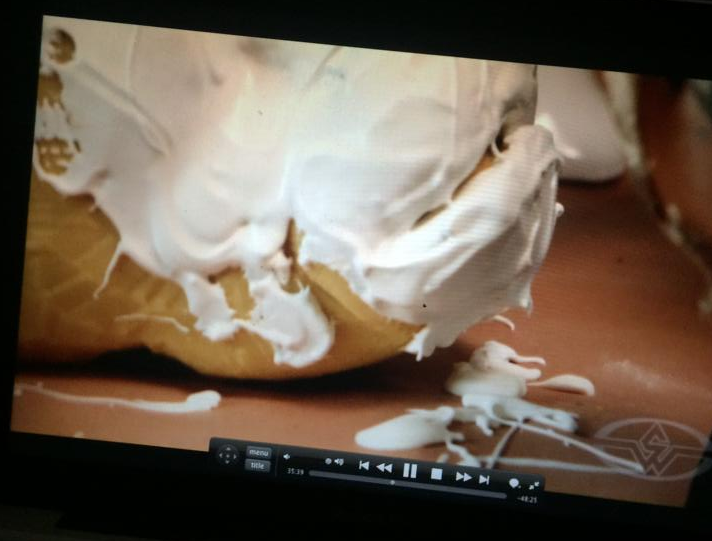
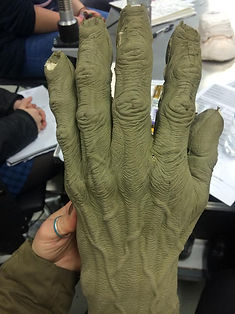
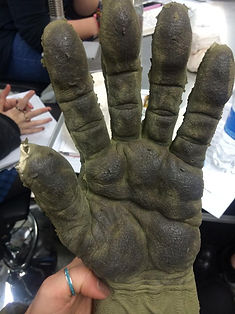
-For tougher areas you can paint layers of cream latex onto the mould, allowing it to dry and then pour in the foam latex. Because the foam latex mix is of the same material it sticks to the latex layers. (See the underside of the hands, above^)
For the flange edges:
Pros-Aide and Cabosile mix can be applied on the areas which do not require movement. Foam latex can also be used to cover the flange in industry. Very sharp scissors will cut through the flange edges. However, the material will blunt scissors very quickly.


BUILDING A FOAM OVEN
Haines, T. (n/a). Foam Fabrication, Texturing Techniques, Stan Winston School. [DVD] Prosthetics studio: Stan Winston School.
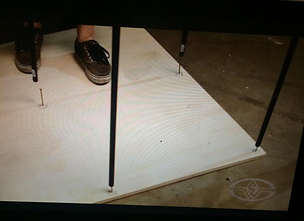
How To:
-Plywood base to work off
-Set your nails where you want the legs to sit (You can buy pre-cut legs from a hardware store, threaded PVC)
-Foil and masking tape around the structure
-Use a heat gun to heat it up and build a structure to strap the heating element to it carefully.
FOAM APPLICATION & PAINTING


Process:
-Use a small dot of pros-aid directly onto the centre of the foam piece and allow drying time.
-Apply a small amount onto the skin and dry over both surfaces. Foam is porous and will dry once the piece is down, therefore there is no need to wait for the glue to go clear.
-Using small amounts of pros-aid and a cotton bud- roll over the edges, outwards to flatten them against the skin.
Process Continued:
-Extra care is needed with the foam edges as the foam cannot be blended or thinned.
-Mix cabosile with pros-aid glue and work around the foam edges with the thick paste, using it as a filler will create an illusion and clean up the edges ready for painting.
PRO TIP: Using different sponges will create different textures on the filler around the prosthetic. The filler creates a smooth shiny edge because of the glue mix and stippling it on will reduce the shine.
Pre colour using pax paint:
Advantage: covers foam well and gives an even finish.
Disadvantage: the texture will wrinkle and creates a thin plastic like sheet
Marabu- Rubber cement is clear and it can be diluted with odour free white spirit, it requires a long prep time. Songarens from dr who are painted with the rubber and Dick smith pinned ripped paper around the edges before painting to protect the edges of the foam.
Continued:
-Foam latex is porous and will take to illustrator and grease paint, soaking in the colour and result in looking very pigmented. To avoid this stipple pros-aid over the foam piece, this will create a boundary layer between the foam and the paint. It will need to be powdered after to take away the sticky texture, otherwise dirt will be picked up on the surface and potentially ruin the piece.


COLD FOAM
Polyurethane Expanding Foam
Below images and written notes: Brooks, N. (2011). Advanced Mouldmaking And Casting . Service Filmsetting Ltd. Stockport: Cheshire.
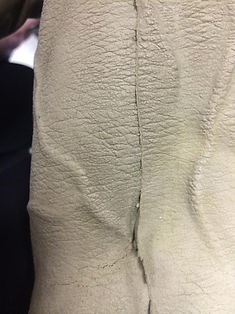
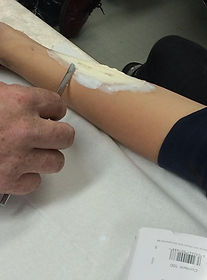
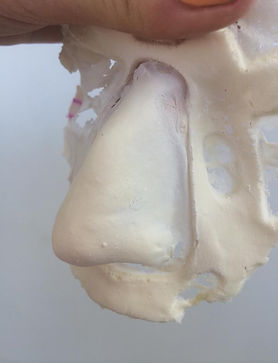
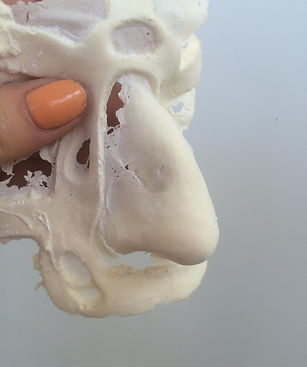
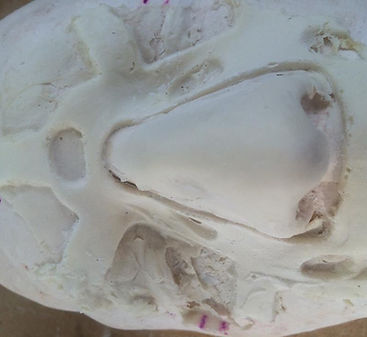
Closed Mould: Foam Result
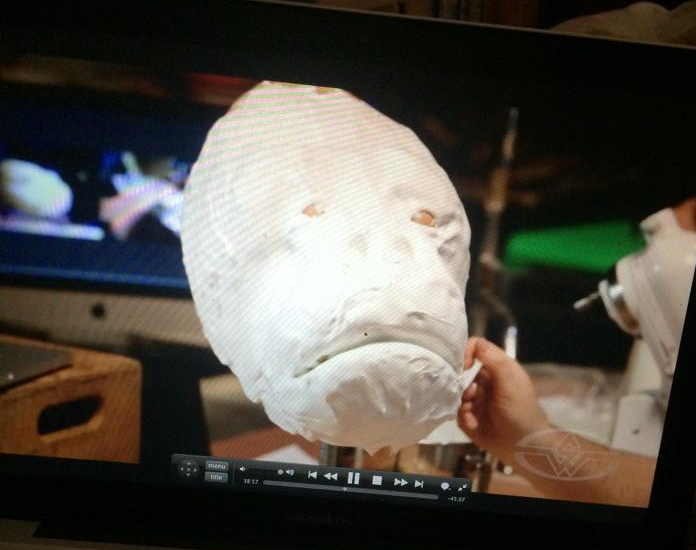
A previous closed mould was used for running the foam and I found it extremely difficult to break apart the negative from the core. I had to use a small flat chisel and a hammer to carefully wedge it open, revealing the foam prosthetic. Some of the edges ripped where the foam was stuck to the plaster but they came out thin enough which will benefit the application process, the bondo mix should effectively reduce them if needed.
There was a small mark on the left side of the prosthetic nose where the foam handnt set correctly and I will attempt to cover it with paints. This could have happened during the curing process if there was any residue silicone on the inside of the negative as it was a used mould. I would need to ensure the mould was fully clean for future reference if I was to use foam latex again.
When would I use Foam Latex?
The foam is very opaque and porous, therefore I dont think I would need to use the technique again unless I was to sculpt a bodysuit or headpiece. Silicone and gelatin both look more skin like and the edges are blendable with solvent IPA for silicone and hot water/ witch hazel for gelatine. I would use silicone or gelatine for most face/ body prosthetics for realism.

PAINTING THE FOAM


Pro Tips:
Painting technique 'Wet on Wet' used to paint draculas mask with Acrylic paints. Mix a flesh tones foundation with water and acrylic pigments on a colour palette, mix a large amount.
Apply the paint over the foam mask with a large soft watercolour brush. The key is to keep a transparent look, working in layers from light to dark. Use a piece of excess foam from the trimmed edges to test the colour out first. Be careful as the foam absorbs the acrylic pigments well and it is hard to remove if the colour is too dark.
Mix a rouge colour by adding a small amount of red tint with the foundation base and apply to the lips, cheeks and a little amount all over the face- including the ears.
-The foam is opaque and is extremely hard to colour, starting with a blood layer is effective- matching the skin undertones, then building up with colour to create a skin base.
-Rubber mask grease paints are ideal for painting foam.
-IPA mixed with grease paint: mixing the alcohol with grease paint will thin the paint down.
-Bluebird illustrator pallets are flexible and more durable, they come in a variety of colours similar to the skin illustrator palettes
-Practise in layers and attempt to colour the foam with different materials, each will give a different finish

Page 32. Debreceni, T. (2013). Special make up effects for stage and screen: making and applying prosthetics. 2nd Edition. 70 Blanchard Rd Suite 402 Burlington, MA 01803. Focal Press.
FOAM NOSE APPLICATION
 |
|---|
 |
 |
 |
 |
 |
 |
 |
 |
 |
 |
 |
 |
 |
 |
 |
I sealed the front and back of the foam with Kryolan fixing spray before gluing it to the models face, the foam nose was damaged down one side initially and I had to use a Bondo mix to fix the surface and smooth down the outer edges. Once the Bondo had dried, talc was dusted over the foam and surrounding area to remove the tacky surface (from the Bondo).
I patted the foam with a stippling sponge dipped in Pros-Aid glue to completely seal the surface and create an uneven texture, this way the piece wouldn’t look false against the models skin. Once the glue had dried I applied talc to the surface again and began painting.
I used Kryolan grease paints diluted with IPA to paint the foam in thin layers and by layering the colours I managed to create an illusion of translucency. I started with a base layer of red and worked towards matching the models natural skin tone, very small amounts of blue and green where used in the mixing to create the desired colour, matching his natural skintone. looked at the central points (the cheeks, forehead, chin and upper lip) which where covered in small broken capillaries. I wanted the texture to continue onto the prosthetic piece and I used a stipple sponge dipped in diluted red greasepaint to graze the surface, the effect was successful and the transfer looked exactly like broken blood vessels.


Mixing:
-The amounts of the liquids to combine to create the foam are usually in ratios of two parts (2:1 or 1:1), always check the manufacturers instructions for the specific material you are using.
-The amount of foam to be used should be found by weighing and not calculated by volume.
-Use a small palette knife to mix small batches and a crdless drill and mixing blade for larger batches.
-The amount of time to mix batches is known as ‘CREAM TIME’, this can be 15-45 seconds- check the manufacturers specification.
PRO TIP: Dispense both parts of the liquid foam into one container to avoid a loss of material from pouring from one container to another to combine (can result in under-curing and tackiness).
Pouring and Curing:
The amount of time the foam takes to fully expand is known as ‘RISE TIME’, and this can be 1-6 minutes. Demould times can be 20-45 minutes, these are minimum times before remoulding and full cure should be achieved before demoulding.
PRO TIP: Full cure times can be 12-24 hours, some foams can benefit from ‘post-curing’ at raised temperatures to achieve their full properties. Check the manufacturers specification for varied cure times.


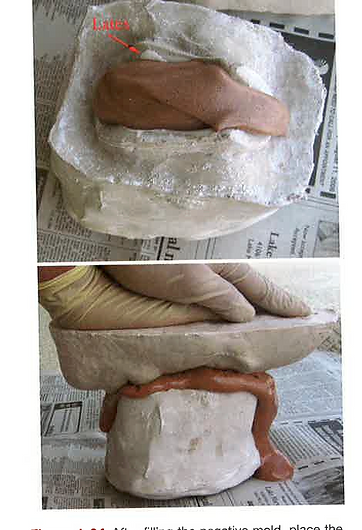
Above and Below images : Huaixiang, T. (2007). Costume Craftwork on a Budget: Clothing, 3D MakeUp, Wigs, Millinery & Accessories. Elinor Actipis. Burlington: Oxford.
Pre Colouring: Pro Tips:
-Add flesh food colouring to the foam part B, the prosthetic piece can also be coloured with grease paint or aqua colour makeup pigments after being made.
-Pre-colouring the foam piece will make it easier to colour after. Food colouring is good to use because it is safe and inexpensive.
-The number of food colouring drops used to produce flesh- tones prosthetic pieces is proportional to the amount of cold foam being used. The colour proportion that most closely matched the actors skin tone is:
3 drops red + 3 drops yellow + 1 drop blue + 1 drop green.


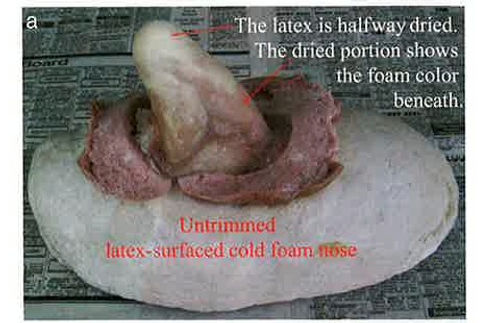
Below images : Huaixiang, T. (2007). Costume Craftwork on a Budget: Clothing, 3D MakeUp, Wigs, Millinery & Accessories. Elinor Actipis. Burlington: Oxford.
Rise Times: Precautions:
Pour part A into part B and mix quickly (less than 10 seconds to make a nose). For a full mask a mixer or blender will be required, a few seconds after both parts have mixed the foam will begin to rise, this chemical reaction is toxic to breathe.
Work in a well-ventilated room and wear a mask during the process.
-Pour the mixed cold foam into the negative mould and quickly place the positive mould on top of it, pressing firmly.
-If you are using latex as a skin for the expanding foam then wait 5 or so hours for it to dry, otherwise wait 25-30 minutes.

Demoulding:
Loosen the foam edge from around the positive mould with the other hand; Slowly separate the moulds by pulling the negative mould downward and forward.
Most of the time the foam will stick to the negative mould, powder in between the foam and the negative mould with talc whilst pulling it apart.
How has this helped:
I will use the research techniques above for creating a positive mould of a taxidermy deer skull, as one of my designs for survival instinct in human behaviour. The skeleton will act as a mask of protection against the face and I will cast it in silicone then fill the mould with fast cast resin and expanding foam. This way the piece will be light and look like bone once it has been painted.
Haines, T. (n/a). Foam Fabrication, Texturing Techniques, Stan Winston School. [DVD] Prosthetics studio: Stan Winston School.
TEXTURING FOAM
Foam Fabrication, Sculpting Techniques with Ted Haines
-Sanding Dremmel , take it in one direction, you can only sand and refine the foam in one direction. Always work away from yourself.
PRO TIP: Cut out sandpaper in a circle shape with scissors and attach it to the dremmel. Spray glue is used to adhere the foam together. 3/4 inch foam is used under the eyes and 1/8 inch foam for the upper lids.
Pax paints and rubber cement paints will stick to cellophane. 74 spray is used to glue it down, it can be tucked into sliced areas of the foam, check wrinkle direction accuracy as you go and go over it again in layers.
 |
|---|
 |
 |
 |
 |
 |
 |
 |
 |
 |
 |
 |
 |
Plastic Wrap- Cellophane:
PRO TIP: Use the heat gun to shrink the cellophane wrap and work with small pieces. If you want it to all paint the same then use the same material all over the surface.
‘Full moon movies from the 90’s all use the same texturing techniques, low budget”
Use baby powder on a tool to push in areas on the sculpt without it sticking to the cellophane. A sharpee pen can be used to define and show up any of your texture and the heat gun will shrink any edges you have. If the heat is too high in temperature, it will delaminate the wrap.
PRO TIP: Check the detail with grey or coloured spray paint. Follow anatomy- the direction that wrinkles would naturally lie on the face by layering more wrap. Cotton balls and latex rubber can be effective for texturing.
-Spray glue over the surface and lightly paint and draw the rubber over, not pushing it into the material but layering and carving in with talc covered spatulas will create detail and wrinkling.
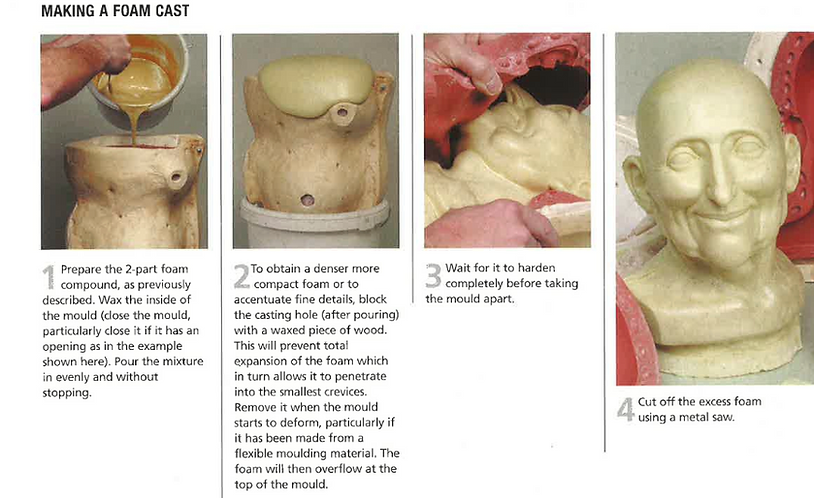
Delpech, J-P. and Figueres, M-A. (2004). The Mouldmakers Handbook. A&C Black Publishers. Soho Square: London.
Polyurethane Foam:
2 piece resin compound which foams and hardens after mixing. It produces a flexible or rigid foam, which does not melt when heated nor dissolve when in contact with acetone based products.
Its strong resistance to ripping or breaking means it can be used as a casting material for severely undercut moulds. It can also be easily used for a sculpting model.
PRO TIP: To seal and harden a damp, clay model, apply several layers of polyurethane varnish with a soft brush.
Revising Research: Relevant to my casting:
From researching expanding foam I now know to block the casting hole to accentuate any fine details in the sculpt, creating a denser foam. I also now know that the foam will take around 25-30 minutes to set before it can be demoulded, I will take this into consideration whilst filling the mould for my project.