MIRROR IMAGE
ONES ALTER EGO OR HIGHER SELF
HEAD CASTING AND FIBREGLASSING
USING ALGINATE, PLASTER, SILICONE 3481 AND FIBREGLASS

As good practise, I wanted to cast the model in alginate and plaster, this way I was able to clean up the plaster life cast and from that, apply a silicone jacket and finally the result would be a fibreglass version of the models head as the 'core' to sculpt onto. I was going to be using Alginate and therefore, a latex cap was acceptable for covering the models hair. If I was using silicone I to headcast, I couldn't have used the latex cap as it would inhibit the silicone and prevent it from curing.
TIME LAPSE OF THE PROCESS
HEAD CASTING, PLASTER BACK
 |
|---|
 |
 |
 |
 |
Initially, I found the process quite daunting because I headmasted the model before the demonstration workshop and therefore I had to thoroughly research the process to gain a good understanding of the required steps and ensure I didnt forget anything. The research I looked into can be seen on the workshops page on my website under 'headcasting'.
The artists I looked at headcast or 'Lifecast' using different techniques and I decided to combine techniques which I felt worked and looked effective on the videos. I was trying to source 'Algislow' or Alginate Retarder' which I have seen being used a lot, it seems to be a useful product in slowing down the cure time of alginate and as I was covering the face, neck and shoulders, felt it would benefit me. However, I struggled to find the product in the UK and did not have time to order from an American website. I then seen videos of artists using bicarbonate soda mixed with a small amount of water as a retarder, or binding agent for the alginate and I took some with me to use. However, it wasn't needed as a slow setting Alginate was used, with a working time of around eight minutes.
HEAD CASTING THE FRONT
 |
|---|
 |
 |
 |
 |
 |
The model has very long and thick hair and I was unable to wrap it tight enough to get an accurate cast. After speaking with Pete Tindall about the process on the morning of the headcast I understood that the best thing to do in this situation was to tie the hair back in a tight ponytail, wrap clingfilm around the base and the whole length of the hair and finally use tape to secure the clingfilm in place. I felt as though this was a quick and effective method and I was able to achieve an accurate cast from using the technique.


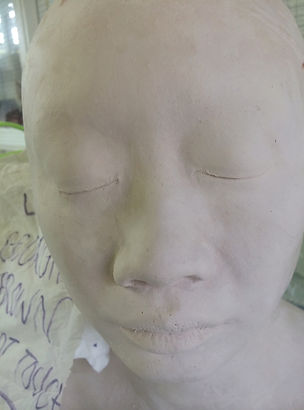
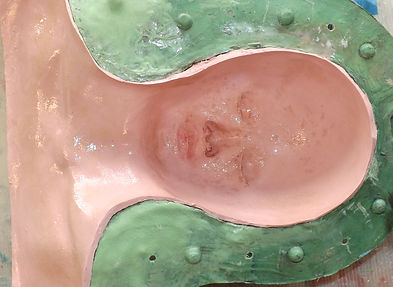
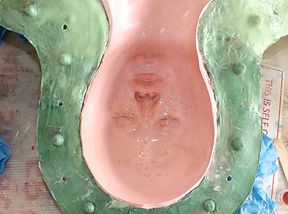
The back half of the cast was firstly taken off, it seemed to slide off easily because of the relese agent used on the models face, neck and on the bald cap (Nivea cream was used). Once the back of the cast had been removed I asked the model to lean forwards and move her face in order to release the front with ease, I also asked her to close her eyes to avoid feeling dizzy or faint with the lights. /i turned off the lights and allowed only the natural daylight to light up the room. This way the models eyes were able to adjust to the sudden light change.
During the head cast I used a light brown shade from the SCREENFACE grease palette to draw on the models hairline, it successfully transferred onto the alginate and a clear outline was noted. I did not need the models hairline for this particular sculpt and it was only drawn on for good pracitse. I didn't want to miss any of the necessary steps throughout and therefore anted to see if the transfer would show as expected.


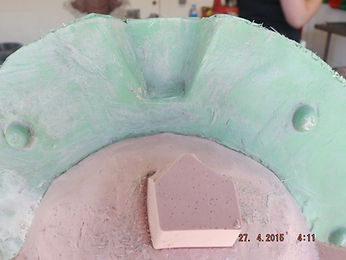
I applied superglue to the alginate on inside of the cast, around the edges of the nostrils. I also added a small amount to the back of the cast and pushed a very thick mix of alginate through the cast. From the inside, the nostril holes were now blocked up and pushed outwards, however, when the positive is cast from the negative they are inverted and the holes look neater and more professional.
I added release agent (petroleum jelly) to the back of the plaster cast to ensure the plaster being poured would not adhere to the back half. I then super glued all of the edges of the alginate to the plaster bandage jacket to keep the material in a fixed position whilst filling the mould. Afterwards I fixed the two halves together and secured them with plaster bandage. Plaster bandage was also laid over the alginate area which was pushed through the nose. The material was left to dry and placed upside down in a bucket with soft towels to support the weight.
 |
|---|
 |
 |
 |
 |
 |
FILLING THE MOULD
PLASTER FILL, PROBLEMS RESOLVING AND CLEANING UP


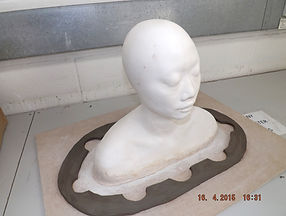
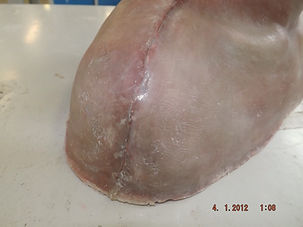
During the plaster fill there was a shortage of fine casting plaster and the workshop had ran out, I was unable to fill the mould sufficiently until the morning after and had to use the plaster to cover the base f the head and neck, wiping ip up across the alginate to avoid the material shrinking overnight. In the morning I added scrim to the neck of the mould as a support bandage and grip for the next layer of plaster. The plaster was repoured and left for three hours before I began de moulding the positive cast.
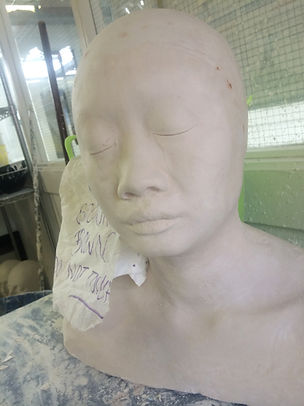
Due to the material being thin where I had to push it up the sides of the mould during the first fill, the plaster had cracked on the surface around the neck and across the back of the positive. I pulled away all of the weak material and began filling in the holes with more fine casting plaster. The above photographs show the positive after I filled in the cracked areas, below are images of the faults.


CLEANING UP THE POSITIVE

 |
|---|
 |
 |
 |
 |
 |
 |
 |
 |
 |
 |
 |
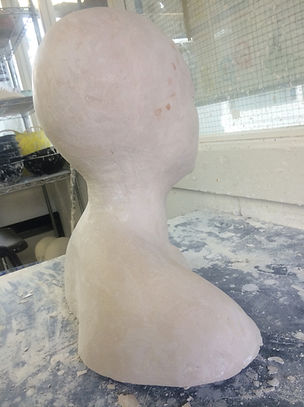
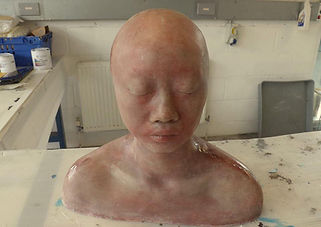
Various sanding tools were used to clean up the headcast and the surface was smoothed over with a fine wet and dry sand paper, loosing the dotted hairline didnt phase me and I didnt try to keep the outline in place, I could have used a drill to create indents were the hairline would sit if necessary and may need to include that process in a third year project. I used a large metal scraper and more fine casting plaster to mount the positive to a board before creating the keys and touchdowns for the silicone jackt, see images above.


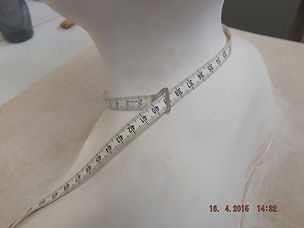
Models head and neck measurements:
Neck- 32 cm middle
Base of the neck-39 cm
Top of the neck-33 cm
Around the face-58 cm
Back of the head to the forehead- 52 half cm
Back of the head to the ears- 53 cm
Crown of the head-50 an a half cm
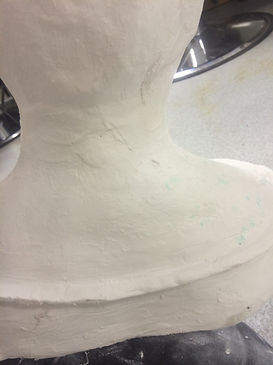
Above, a soft tape measure was used to gain accuracy in the measurements of the core before applying the silicone jacket for the final fibreglass stage. I wanted the core to be as accurate as possible to ensure the prosthetic would fit comfortably and moreso correct on the models face and neck. Once I had achieved the measurements needed I began cutting up wed clay and creating the touchdown areas around the core, the touchdowns reqired cut out key sections to ensure the fibreglass would sit securely around the silicone- locking it in place whilst the mould is being filled.


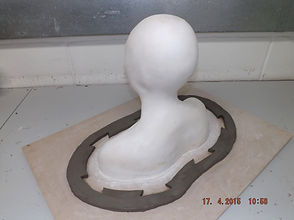
As the process was new to me I wanted to be sure I was completeing each stage correctly. I built up te clay wall around the base of the plaster positive and asked a technician in the workshow to advise me on the keys, I originally presumed that the keys could be any shape and to an extent they can be. However, in order for the fibreglass to grip the silicone and keep it in position they need to be narrower on the inside edge and wider towards the outer corners, this creates a locking point for the fibreglass and secures the jacket. Therefore, I had to re-build the touchdowns and the wall and alter the shape of the keys.
 |
|---|
 |
 |
 |
 |
 |
 |
 |
 |
 |
 |
 |
 |
 |
 |
FIBREGLASS JACKET
SILICONE 3481, KEYS, SEAMLINE AND CLAY WALL
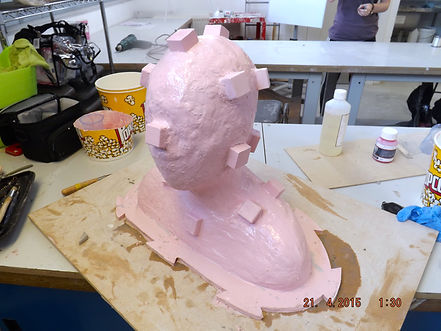
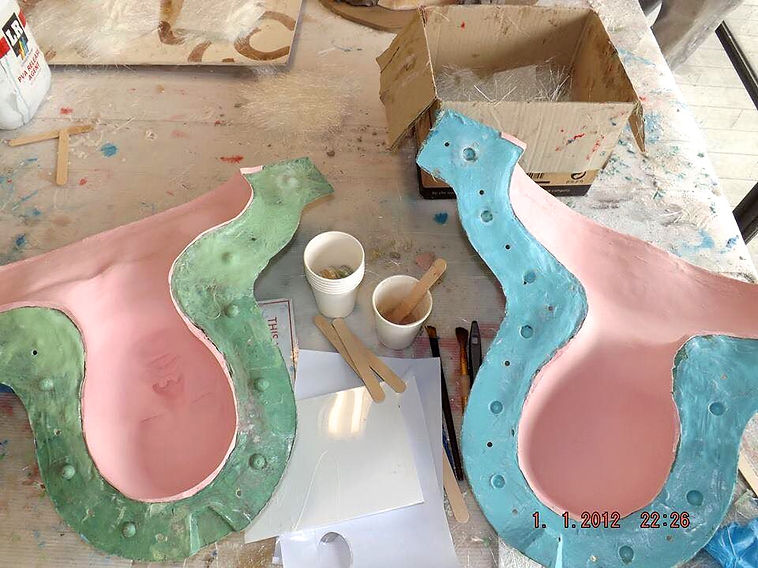
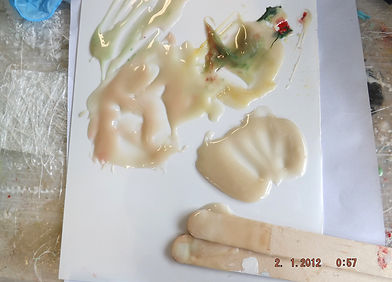
Two 1kg tubs of silicone 3481 were needed to cover the surface of the head and neck, one tub per layer of silicone. The first layer was poured from a height over the plaster core to reduce the formation of air bubbles on the surface, this is the detail layer and I wanted to be sure the core was covered otherwise it would have effected the turnout of the new fibreglass core. I purchased the fast setting catalyst, however, I still waited in between 18 and 20 hours to apply the second layer as there was a large surface area to cover and I wanted to avoid distorting the surface. The second layer had a mix of around two to three drops of thixotropic added to the mix, the silicone then had a whipped cream texture and I was able to smooth it onto the surface of the already set rubber, with a disposable dental tongue depressor.
STUART BRAY
FIBREGLASS, MASTER MOULD. PRO TIPS AND ADVICE
StuartBray. (2012). Using Fibreglass: Part 1. Available from: https://www.youtube.com/watch?v=gMOvEnjvaZg (Accessed: 3rd April 2015).

Whilst the silicone was curing, I had some ready-made silicone cubes, which I added around the surface before fibre glassing. I purchased a square silicone tray as I feel the squares have more body to them, they will grip the fibreglass and the jacket will be more stable inside of the mould. Cheese cloth was cut into small rectangles and placed over the squares whilst they were setting inside of the tray, this step was to give the silicone more to grip whilst adding them to the surface of the jacket. I placed them around areas of the core where I felt needed to be secure and fixed in place… The seam line, front and back of the head and on the neck.
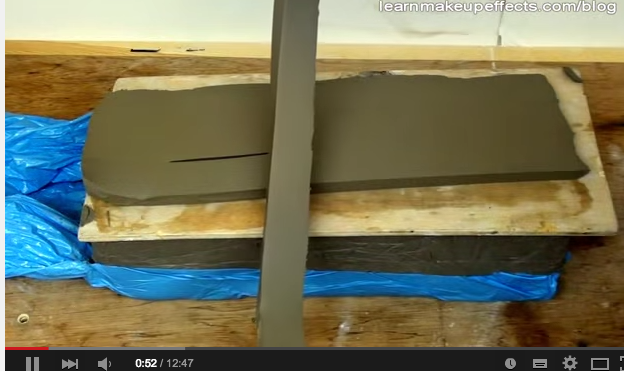


-A clay cutter is used with wed clay to get clean even slices of clay which will be sliced into strips and used to create a wall on the plaster core.
-Go over the top of the head and around the ears, just past the half way point so that the back will come off easily, only fibreglass is necessary on the back because the detail is not needed for the sculpt. Silicone will first be laid across the front.
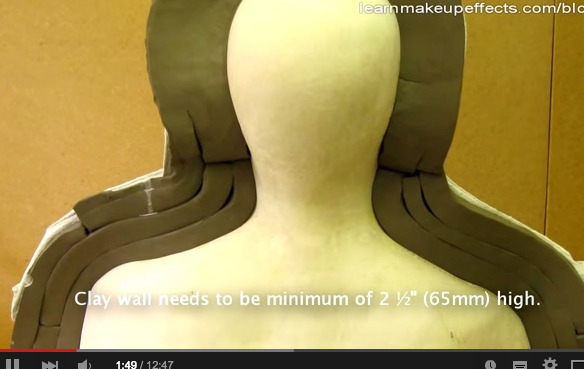
-The clay wall needs to be a minimum of 21/2 inches (65mm) high around the core. Think about undercuts.


-Once the clay is in place the whole front of the face is covered in damp tissue paper, this protects the face against any plaster from the plaster bandage or any other material being used. The tissue conforms to all of the shapes nicely and should just peel off afterwards.
-Plaster bandage is applied to the front of the clay wall to support it (two or three layers folded over) during the fibreglassing process on the back of the head, if the clay is not supported it can move whilst fibreglassing.
-Once the plaster bandage has set, use flat bladed tools to smooth out the clay and neaten up the wall. Make sure the clay sits square up against the plaster and take it right down to the board too. Everything you do will be picked up by the fibreglass, make it s neat as possible. The use a loop tool to create a key on the back half as a locking point, this will ensure the front and back lines up nicely. Chunky keys are cut out and placed carefully around the wall, they are secured down and blended with tools, a brush and water.
-When mixing the gel coat- more catalyst is added because there is damp cold moisture inside of the plaster head and this can slow down the cure time for the gel coat and resin. It is mixed through thoroughly before being brushed over the surface with a disposable brush.
-Apply the fibreglass matting around the edges first and overlap each piece of glass slightly to ensure good strength and coverage. Two layers cover the whole back piece and three layers around the edge (the flange) They need to be thicker than the rest to make sure the mould all last a long time. When you are opening the mould it is the edges which get most of the stress from tools.
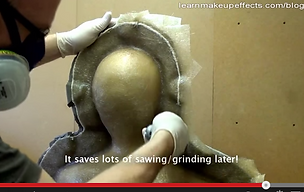
-Use a sharp utility knife (Stanley knife) to carefully trim the fibreglass whilst it is still curing but almost dry, it should be cheese like and stiff. This will prevent using power tools later.
-The resin will get warm, as soon as it is firm enough you can remove the plaster bandage and clay from the front. This is a good time to remove the clay wall because when it is slightly warm it will warm up the wax and the clay should remove easily, peeling away with ease. Wash off any excess with a sponge and water or a brush.
 |
|---|
 |
 |
 |
 |
 |
 |
 |
 |
 |
 |
 |
 |
 |
During the fibreglassing process I accidentally forgot to catalyse the gel coat layer andI lost one full day of working time due to this, I had to scrape away the gel coat from the entire surface with a disposable tongue depressor and mix up a new batch. Once I had the gel coat catalysed I used a disposable brush to coat the surface, ensuring all areas had been reached. I pigmented the gel coat and the fibreglass to differentiate the two halves in preparation for de moulding the jacket. I also used a sharp craft knife to cut away the excess fibreglass strads which overlapped the wall, as seen on the stuart bray tutorial above.
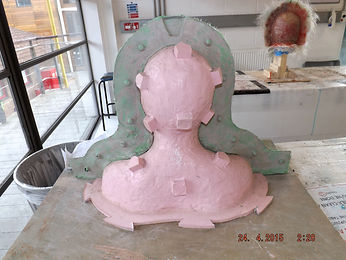


There were flaws in the join between the wall and the silicone due to the original uncatalysed gel coat layer leaving residue on the surface of the silicone jacket. I spoke to a workshop technician about the issue at hand and the simple solution was to fill the gaps with car bosy filler and use a flatt ended tool to smooth down the material, leaving a perfect line. I used the car body filler to fill some of the holes in the keys around the wall and a sharp cutting knife to trim the edges of the silicone cubes- leaving some leverage for de-moulding the plaster core.
RESOLVING- PROBLEMS FACED


 |
|---|
 |
 |
 |
 |
 |
 |
I used three layers of blue PVA around the inside wall of the fibreglass and covered the wooden board. This was very time consuming and after speaking to a student on modelmaking I know to buy clear lacquer to use as a sealant for fututre moulds when dealing with fibreglass and wed clay. I should have used talc mixed in with the gel coat around the keys of the mould to prevent the bumpy surface from forming and I know now to do this, another mistake I made was only applying two layers of the glass matting around the clay wall. The wall requires at least three to four layers as it needs stability during the de moulding process. I found this out when I tried to pull the two halves apart and cracked the wall in areas and although the wall didn't split, it wasnt rigid and instead it had flexibility which is not ideal for multiple runs.
LEARNING THE TECHNIQUE- FAULTS
FIBREGLASS CORE
INTRINSIC COLOURING, EXPERIMENTATION- HYPER REALISM

IMPORTANCE OF DEVELOPMENT, LEADING INTO THIRD YEAR OF STUDY:
I have always been influenced by hyper realism and I am inspired creatively by the likes of Ron Mueck, Sam Jinx and Richard Stipl, each to their own have raw talent when it comes to intrinsic and extrinsic painting techniques. The sculptures they create are flawless down to fingernails and fine arm hair and this is an area of prosthetics that I feel is important to build on as a developing artist.
In my third year of study I will focus on this technique in greater depth and look to educate myself further on these particular painting skills and life like sculpture development. This project is the beginning of this journey into hyperrealism for me and I wanted to push myself through each stage as hard as I possibly could and in fact, surprise myself with my own development and determination throughout.

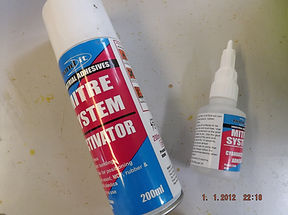
I bough a super glue with an accelerator which I used to secure the outer sides of the silicone rubber to the fibreglass jacket whilst I painted the mould, this was to enable me to paint the mould without the rubber flexing and distorting in shape. The accelerator is extremely dangerous and I had to use it outside and away from any doorways, I had to wear a mask whilst using the accelerator.
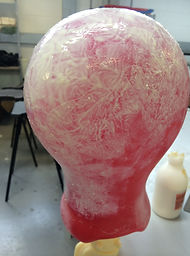
The gel coat was mixed with tiny amounts of pigment in multiple layers and I started by laying in a base wash over both sides and waited half an hour before adding in any detail layers. The gel coat took around 30 minutes to go tacky; I had to be patient with it to avoid destroying the surface of the fibreglass core. I found it difficult keeping the gel coat at a translucent opacity because it is originally pink and not clear, however, the colouration was a good match to the models natural skin tone and I began adding in small freckles, darker spots and highlighted the high points (collar bones, cheekbones, jawline and brow bone).
 |
|---|
 |
 |
 |
 |
 |
 |
 |
 |
MISTAKES MADE
After I had painted in the highlighted areas and added darker spots and lines for the contoured areas; hollows of cheeks, eye sockets, neck, underside of chin, shoulder blades etc, I started to mix flocking into the gel coat whilst referencing images of the model. I began painting in faint freckles around the nose, darker pigment in the lips and eyes and moles on her neck.
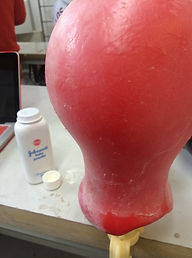
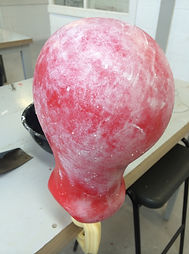
Finally, I lay in the fibreglass matting and unfortunately made a mistake with the colouring. The gel coat layers were so thin that the matting was the dominant colour and instead of adding a flesh coloured layer before the blood layer, I added two blood layers. One blood layer was a faint red and the second a deep purple with blue tones, instead of doing this I should have added a flesh tone layer of matting to suit the models natural skin base and then backed that up with a second blood layer.
 |
|---|
 |
 |
 |
 |
 |
 |
 |
 |
 |
 |
 |
CORE OVERVIEW

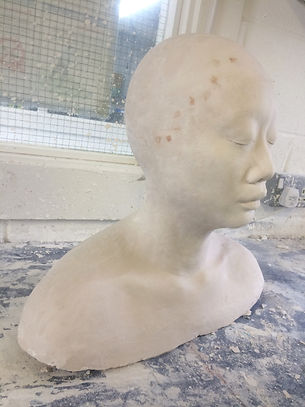
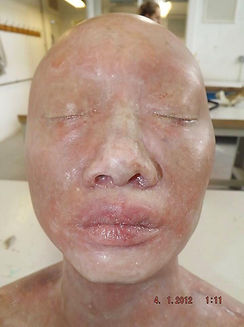
I added small amounts of gel coat over the left side of the seam line to better seal it and matte down the blood layer which was showing through darker. The end result looks like a decomposed body because of the mistake made with the fibreglass matting pigmentation. However, I can see the detailing of the freckles and highlights- contoured areas and I am overall happy with the result. I feel as though I have achieved a good quality core to sculpt onto with accurate measurements and the surface isn't flawed. In the third year of study I will look to improve on the technique and hope to reach a level of intrinsic painting I can showcase in a professional portfolio of work.


FINAL RESULT

